The Nvidia GeForce 6800 PCI Express 16X video adapter has an onboard programmable
graphics processor and is equipped with a large heatsink and cooling fan.
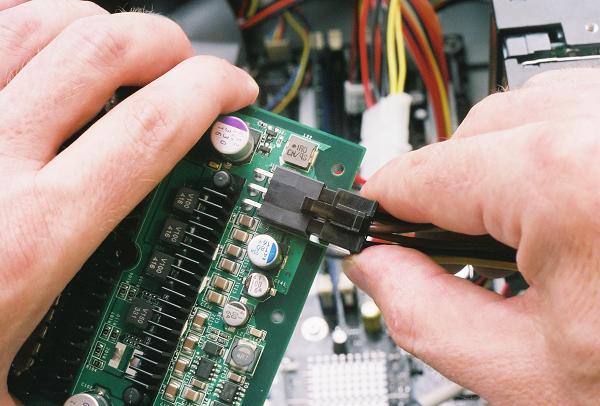
In order to ensure that the adapter gets sufficient power, it requires a
direct connection to the power supply. The video adapter was shipped with
a custom power adapter, which in turn is connected to a standard 1x4 power
supply lead, just like our SATA power adapter in Figure 47.
Figure 48: Attaching the custom power adapter to the video adapter
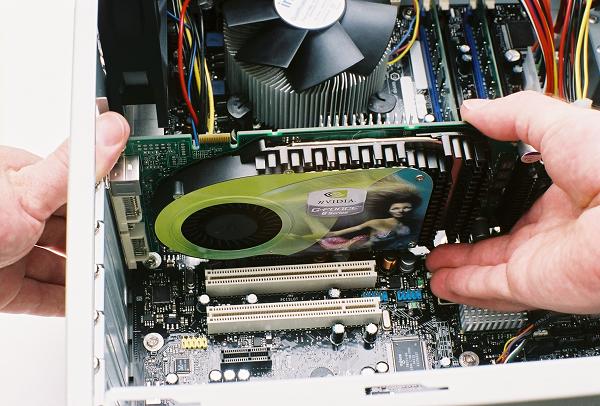
The PCI Express 16X adapter is installed in the sole matching slot on the
motherboard. There is a locking mechanism to help keep the adapter seated
in the slot, though it's not the full lock that's commonly used on AGP slots.
The little black locking tab is being pushed out by the finger to the lower
right of the mermaid, while the adapter is seated in the slot with even pressure
from both hands.
Figure 49: Installing the Nvidia GeForce PCI Express video adapter
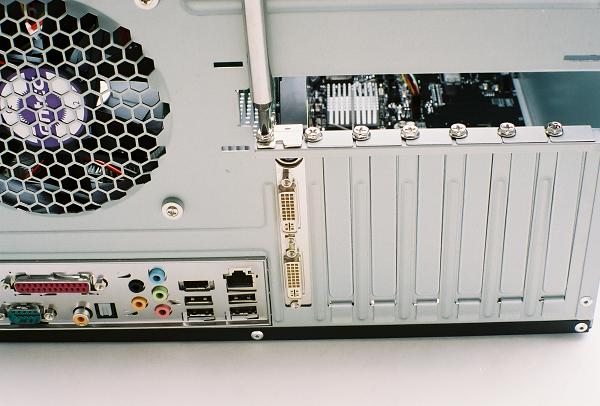
Make sure the video ports are all fully exposed through the rear of the case,
and secure it in place with a screw. This model of the Nvidia GeForce adapter
sports two digital video monitor connectors (DVI) and an S-video port, but
not a single standard VGA port. A simple DVI to VGA adapter allows you to
run a monitor with an analog connector, including most older LCDs, on this
video card. Large plasma displays and newer LCDs are generally equipped with
DVI connectors, or both types.
Figure 50: Securing the video adapter
We installed a V.92 modem in the bottom PCI slot, as far as possible from
the video adapter, which needs room for the cooling fan to be effective.
The modem is seated in the slot with even pressure on both ends, which is
made easy thanks to the opening in the back of the case above the adapter
mounting area.
Figure 51: Installing a V.92 PCI Voice Modem
The "line" and "phone" ports on the modem take up nearly the whole width
of the slot opening, so it's important to make sure the full port is exposed
before securing the adapter with a screw. While it's easy to get a phone
jack into a port even if it's a little off center, it's impossible to get
it out again without straightening the modem.
Figure 52: Securing the modem
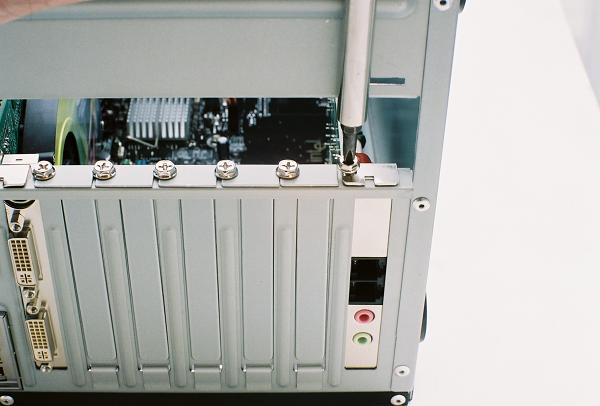
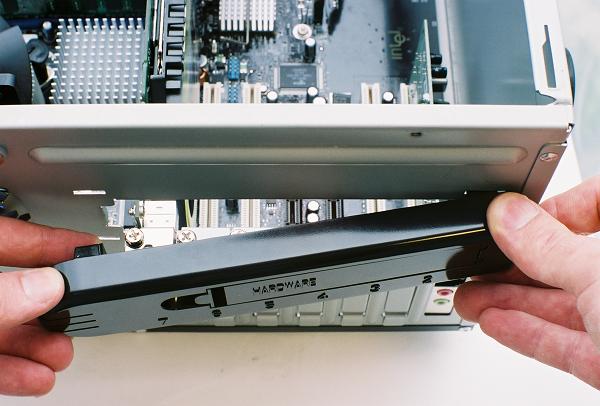
The final step to installing the adapters is to replace the plastic slots
cover. It hinges on the right side and snaps into place on the left, where
the release latch extends into the case. You can see the raised lettering
of the "Hardware" compartment, a handy place to store any leftover screw
when the build is complete.
Figure 53: Reinstalling the adapter slots cover

No comments:
Post a Comment